Got an order for 10 of these….

Just have nine more to make.
Got back from the High Sierras on Saturday. I always pick up a seed bead kit to make while I’m there since there’s no TV or Internet. This bracelet was designed by Laura McCabe. Her patterns and instructions are awesome!! So easy to follow. This one is called Eiffel Tower Bracelet. The Swarvorski gemstones sit up from the base on four “prongs” with a beaded bezel. Very ingenious design, though the bracelet is a bit too gaudy for me. Took me 6 days to complete.

I bought some corded nappa leather a while ago and never got around to using it. It’s a double wrap around bracelet with a magnetic clasp. I want to see how the beads move around, it they drop to the back of the bracelet or stay on top. It’s going to get worn next week to try it out.

I added some sterling silver beads in between the cored beads for more bling.
I’ve been playing with low melt solder and making impressions in it. I decided to try silicone molds as they can withstand the heat.

The one on the left, I melted the solder on a piece of copper and press the mold into it. This mold was made from a button so it’s kind of concave and hard to get a good impression. So I decided to try pouring molten solder into the mold. That’s the test piece on the right. Makes a way better impression this way. I do like the funky edges and I think with a flatter mold I’ll be able to get a good impression and still get the funky edges. More testing to come…..
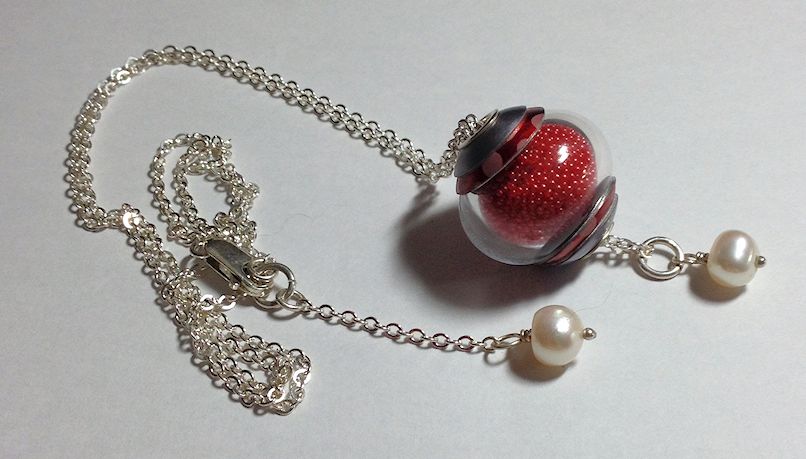
I got this clear hollow made up into a necklace. It has red microbeads inside and the bead caps are anodized aluminum.
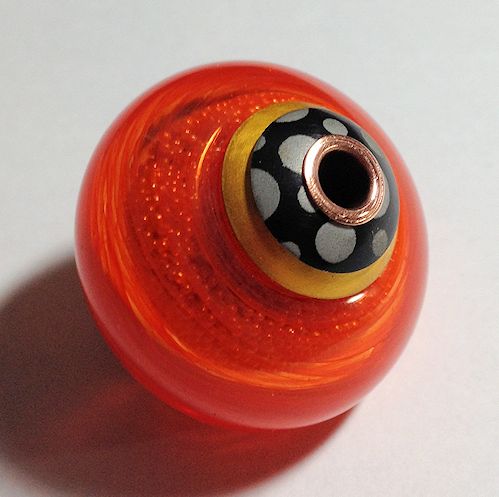
This next one turned out kind of large and I got a few bubbles in it. Not sure what I’m going to do with it yet. I thought the color would turn out more red but it’s definitely orange.
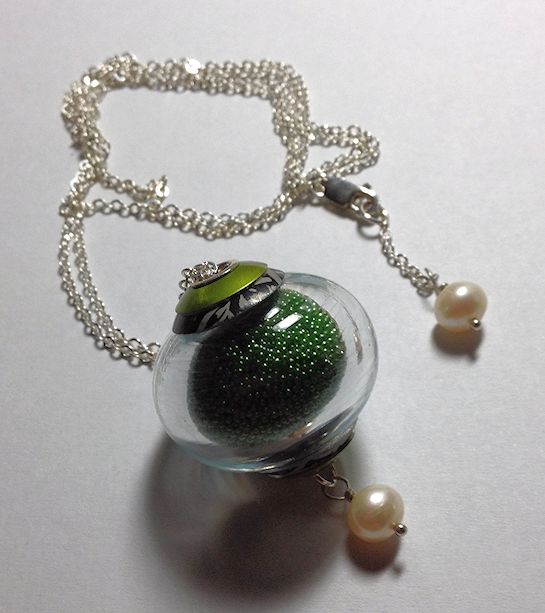
I know it’s green. I accidentally cut the bead caps in reverse. I meant to have the black on top and the green on the bottom so only a little rim of green would show. Since that didn’t happen, I filled the bead with green microbeads.
Another hollow bead made with blue veiled cane. It has some lines in the glass that are different colors. I filled the bead with thin microbeads and strung it on a sterling silver chain. A few pearls finish the piece.

I finally got a clear hollow made. I tried filling it with different medias but nothing was looking good. Finally settled on some gold glitter. Finished it with brass end caps. Put it on a copper bead stick that I made a while ago along with some beads.
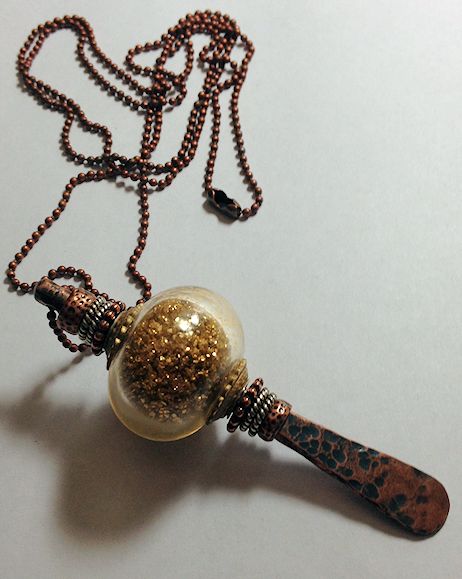 This glitter is a bit chunkier than other glitters I’ve used. Kind of looks like tiny bits of real gold.
Also, more kitty beads…..

Some more sparkle big hole beads……

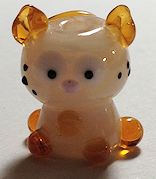
And one kitty bead. This kitty turned out kind of fat. Kind of reminds me of my cat, Igor. His fur is so fluffy around his face it looks like he has no neck.
And a hollow bead that I cored and strung it on leather.

Playing with low melt solder and impressing images into molten solder. Wanted to see how it took color and how if it could be drilled, punched and hammered on. I added a little cab bezel with low melt solder to see how well it would hold. So far, so good. After I was done with testing, I had this piece so I added a few eyelets for a chain and made it into a necklace.
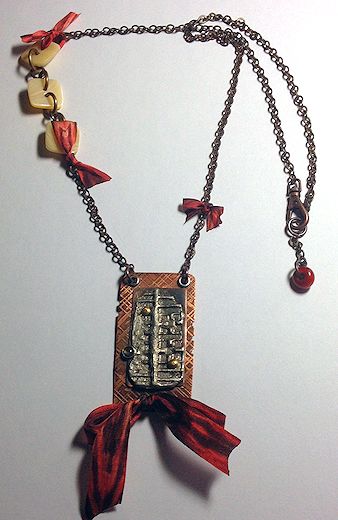
The reason for the bow is because I punched in the wrong spot. While I like asymmetrical, an off center dangle just looks weird. So I had to add another hole. Two dangles wasn’t cutting it either. I tried a few other options, nothing that worked. I added the mother of pearl button to the chain later and I think it helped to pull the piece together.
